Wednesday, May 19, 2010
Sunday, May 16, 2010


Saturday, May 15, 2010
100 Words
My model has been developed from the rhythm and repetition design principal. The principal of rhythm has been used to create the levels, the exterior pieces and the window sizes. This combined with repetition of a single shape has created my model. I wanted to keep with three colours and found that when i altered the orignial tile with neon glow I could choose the third colour i wanted to use. I ended up chosing purple as I felt it was a good contrast between the black and white. I have then matched the purple in my tile with the sketchup purple and used this in my model.
Wednesday, May 5, 2010


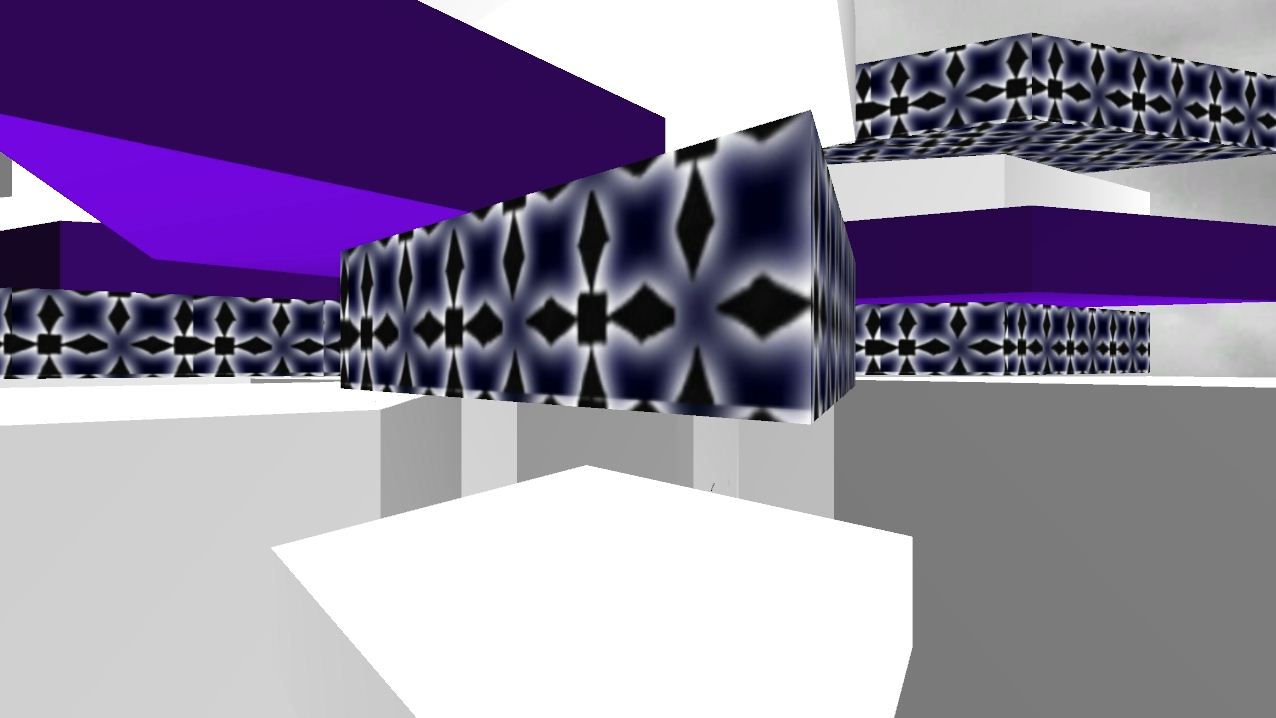
Render Attempt 2 - Interior View with HDR Ray Tracer

Inside the model

Moving into the model

Looking in from the exterior of my model

Tuesday, May 4, 2010
Render Attempt 2 - Interior View with HDR Ray Tracer

Adding more point lights.
I also changed the render gamma in this scene which made the purple lighter than in the rest of the model. I will need to change this back when I add in more lighting.

Adding point lights into scene
To light the interior scenes I had to put heaps of lights into one area to make the whole area visable. I think this is due to my model being so large. From here I can either resize my model in SketchUp so that i am able to use less lights or take the time to keep adding in the interior lighting.


Thursday, April 29, 2010
Render Attempt (39.1kb)

This is a quick render of the exterior of the SketchUp model before i added wall thickness. However I still need to use the model with the thickened walls as when you paint the exterior of this model the interior turns white as well.
Deep Exploration with SketchUp Development

This screen shows how i have thickened the walls on part of the model. The next step will be to continue it around and possibly cut out the repeated shape again through this layer.
Deep Exploration Import

After importing my model into deep exploration the materials from the inside are also showing on the outside. I think I will need to go back to SketchUp and make the walls thicker.
Wednesday, April 28, 2010


Tuesday, April 27, 2010


9 Sketches

Sketch 9
Change the shape of the model so that we can move through it. This isn't actualy possible when everything comes to a point. You would have to move through each thing seperately.

Sketch 8
Trying to made the shape a bit more interesting. Adding bits to the exterior of the shape.

Sketch 7
Just adding in more of the same model for repetition.

Sketch 6
Using design principal Rhythm. So it starts 4 high and then 3 etc.

Sketch 5
Using repetion which is the design principal from project 1 to create windows out of the same shape for light to go into the interior of the model.

Sketch 4
Thinking about moving parts. Possiblity to use as a lift to another level.

Sketch 3
Main center piece going right through with gaps between each layer of the diamond shapes.

Sketch 2
Having the diamond pieces on different levels, forming a staircase shape.

Sketch 1
Layering up and thinking about having the layers rotating around.

Wednesday, March 24, 2010


Subscribe to:
Comments (Atom)